NOVEMBER 3 VICTOR ECHO MIKE
  • Blog
  • Events and Activations
  • Diversions
  • About
  • Gallery
  • Contact
  • Links
  • Subscribe
  • Search
  • Blog
  • Events and Activations
  • Diversions
  • About
  • Gallery
  • Contact
  • Links
  • Subscribe
  • Search
NOVEMBER 3 VICTOR ECHO MIKE

ham radio Projects and musings from a (Relatively) new operator

Ready to Close 'em Up

11/29/2017

2 Comments

 
     The walls that is....
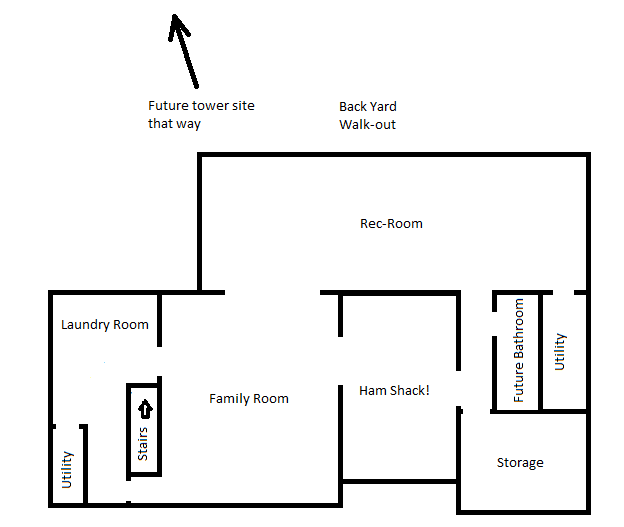
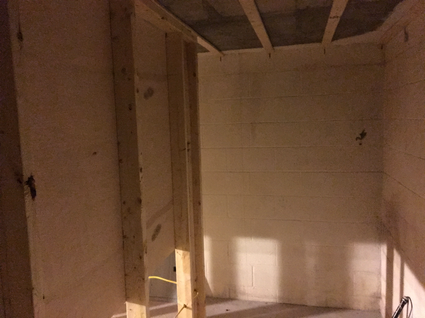
     The Thanksgiving break was a productive one for me.  I've been zeroing in on getting my shack project to the point where I'm ready to start closing up the walls with drywall.  This project is actually combined with finishing the part of the basement under our addition, so there were a few things that I wanted to run across the space that will become the rec-room before I closed things up.  To give a little perspective on the space I'm working in, so that you can picture it a little easier, here's a rough drawing of our basement.  The scale is a little out of wack, but you'll get the idea:
Picture

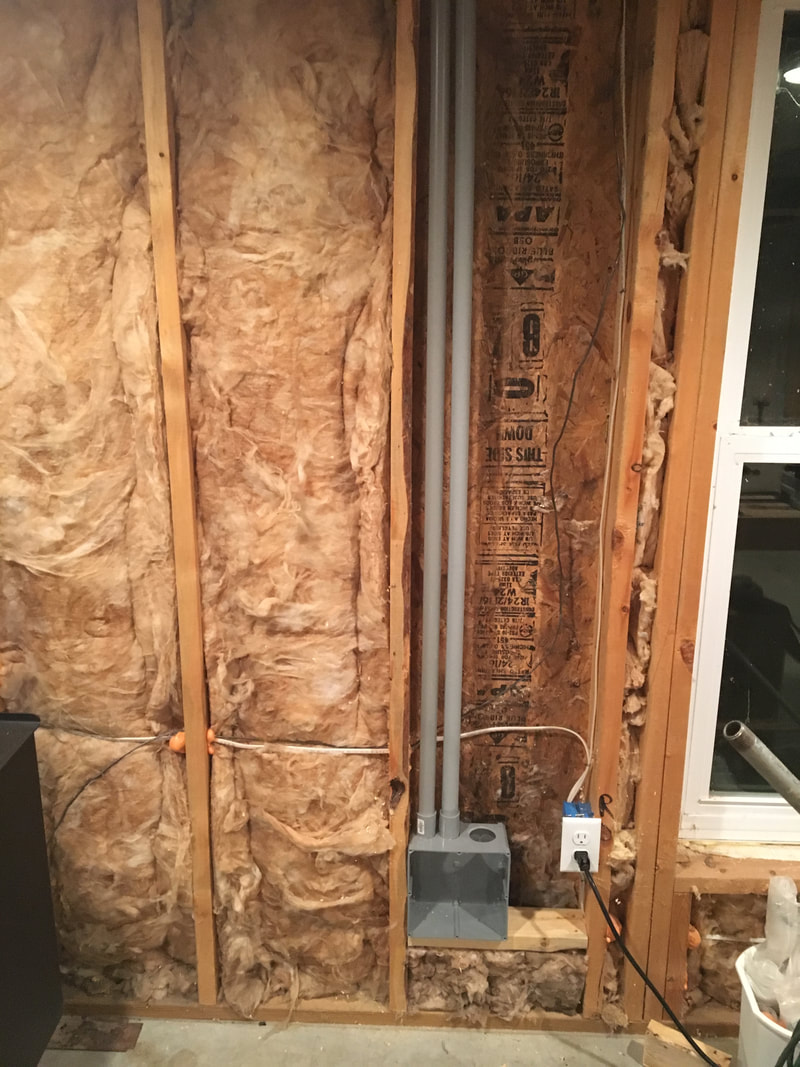
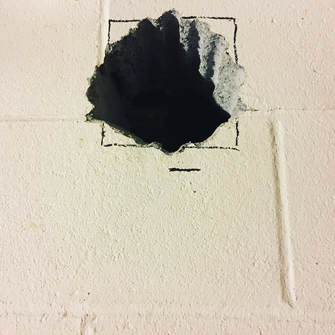
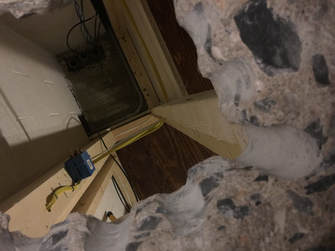
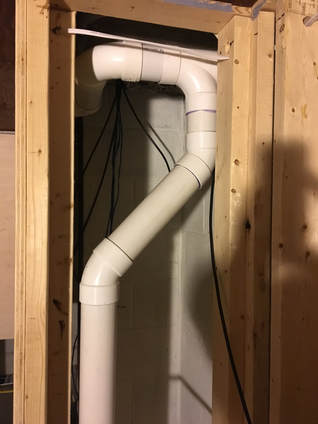
     In my last post I mentioned several things I was planning, and these were precisely the things I ended up getting done.  The first thing I put in was some empty conduit, because even though I am pulling stuff through now, it's hard to anticipate future needs.  In one section the fit was tight, so 1" conduit was the widest I could put in without a lot of concrete busting.  Because of that I made 2 runs side by side, from the back wall of the shack, to an access box that I installed in the back wall of the walk-out basement.

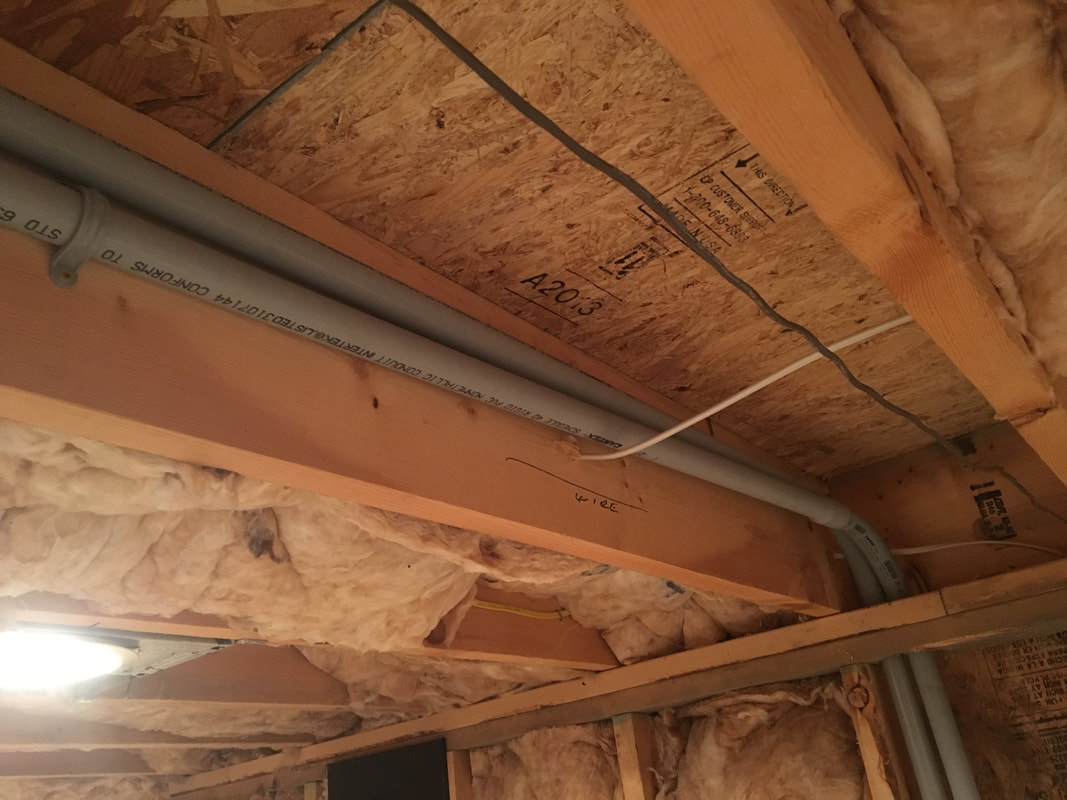
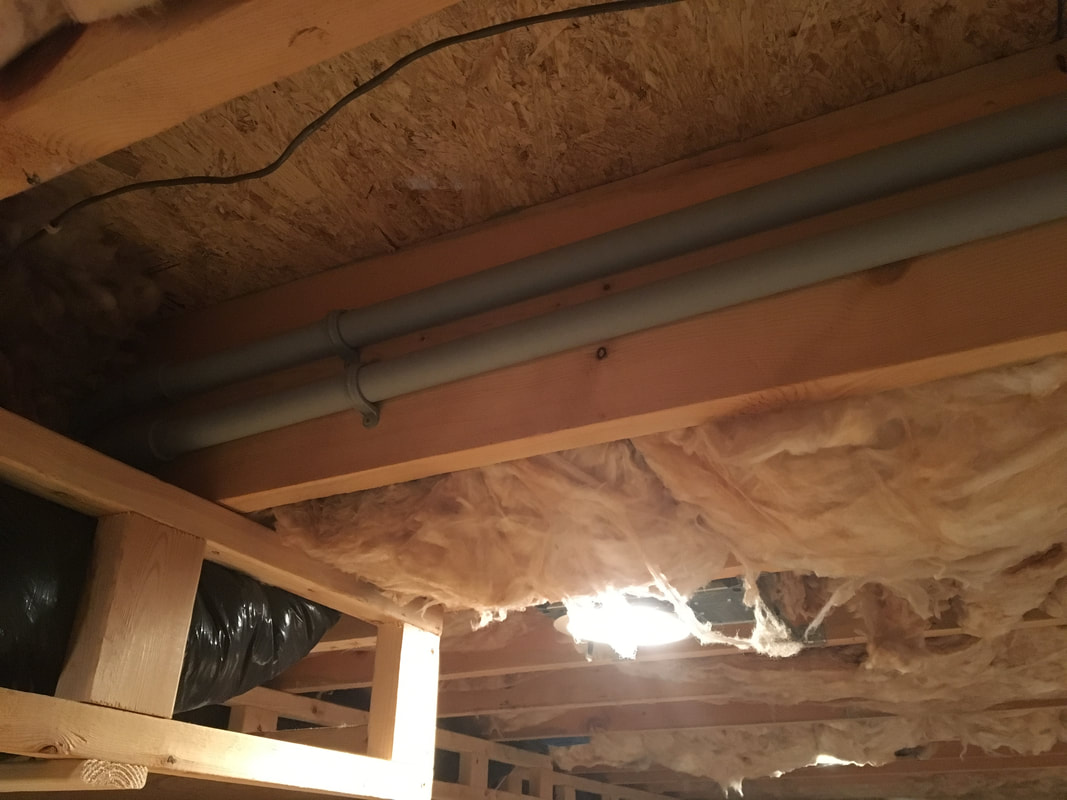
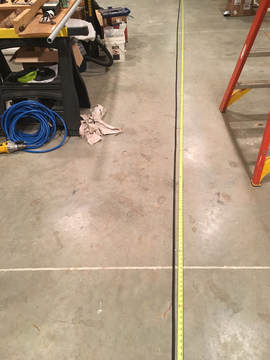
     Next up was the coax.  I ordered enough Times Microwave LMR-400 from DX Engineering to pull 4 runs across the space.  As a side note here, DX Engineering means business with their shipping! My order was big enough to get the free shipping, and it was almost 24 hours on the nose from the time I ordered it till the time it was sitting on porch - impressive!  I ordered the coax in bulk, so I rolled it out lengthwise down the long stretch of the rec-room to cut it into 4 sections.
Picture

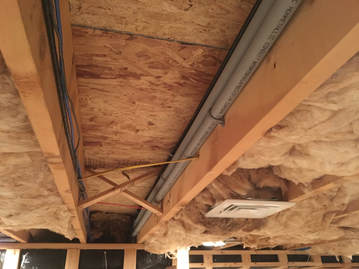
In addition to the coax, I also ordered enough for a single run of control cable, anticipating a rotor at some point in my future.  Finally, I knew I wanted some network cable running from the shack to the tower for potential future uses, so (at the suggestion of a couple different folks) I cut 2 lengths of that as well.  With all these cables cut to length, I tacked up the coax right above the conduit runs, and the control cable and network cables to the other side of the joist bay.
Picture

     In a separate area I also pulled a run of 12-2 Romex from the sub panel in the shack, to a location that I can get to from the outside.  My thought here is that if I end up needing power at the tower, I have a line ready for it, powered from the same source as everything else in the shack.
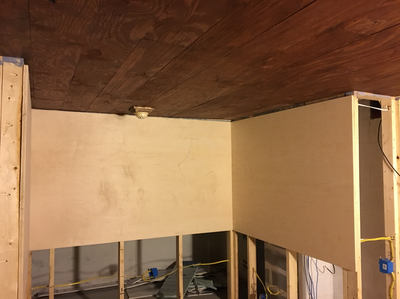
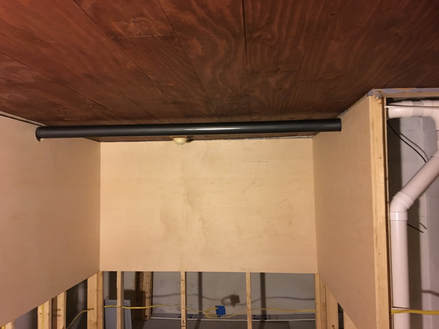
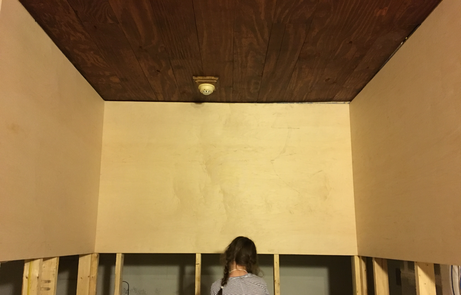
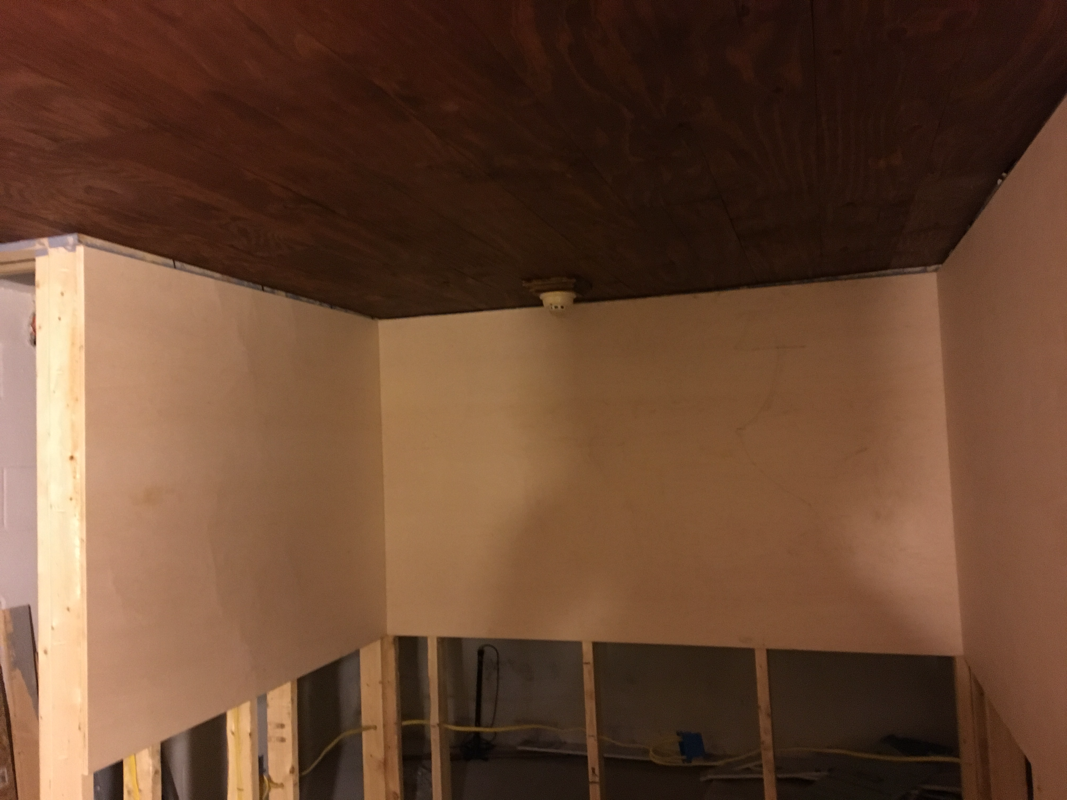
     As hard as it is to do, the next step was to stuff the insulation back in place, and hide all of my hard work!
Picture

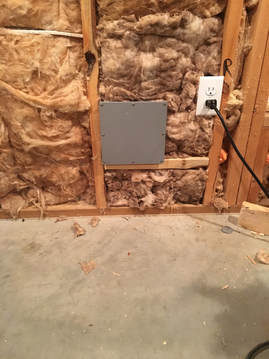
     So with all this stuff done, I'm ready to start closing up the walls.  When I eventually do put up the tower, I'll be able to take the cover off this box, roll the coax and cables out of the way, and drill straight through the back of the box and the exterior wall, to put a conduit to an entrance panel right on the other side of this wall, with runs out to the tower.  easy-peasy!

     Next step, drywall.  I've never hung drywall before, but I decided it was finally time for me to try and tackle it on my own.  I won't be working in the blind though - I have a brother-in-law that hangs and finishes drywall, and a neighbor that used to work for a large drywall distributor, so I'll be leaning on their expertise pretty hard.  If you see anything I missed that you think I should do before I close things up, or if you have any drywall tips, please feel free to leave me a comment - It'll be a few days before I get started, and tips are always welcome!
Previous: Shack Build
Next: Shack Build
Back to Part 1
2 Comments

Blowin' in the Wind

11/22/2017

2 Comments

 
     The last time I gave you an update on my home shack, I was running piping for the radon mitigation system in my basement.  Well, I finally put the (hopefully!) finishing touches on that part of the project!
     All that was left for the radon system was to install the manometer on the inside piping (that's the u-shaped thing with the liquid in it, that tells you if the fan is running), and to order and install the fan on the outside of the house.  A weatherproof single gang box and switch, some conduit, and some liquid-tight, did the trick to polish this off:
Picture

     I still have some grading to do along this side of the house from the addition we did, so don't judge my dirt and leaves too hard :-)  With everything wired up and the final bits and pieces in place, it was time to turn the breaker on, and then throw the switch, so that I could say (to the tune of the well known Bob Dylan Song) "The radon my friend, is blowin' in the wind.  The radon is blowin' in the wind."
     With the fan running, I turned my attention back to the inside of the basement, where me and my trusty caulk gun went all over the basement sealing every crack and expansion joint we could find.  All that's left now is to let the system run for a couple of days, and then conduct another radon test to see if I'm done, or if I still have more work to do.

Some Other Stuff Too

     The radon system isn't the only thing I worked on in the last few days.  I also pulled the service cable from the main breaker panel in the house, to my new shack. After weighing cost, distance, current requirements, etc.  I ended up deciding to use 2-2-2-4 cable, protected with a 90 amp breaker.  This kept the cable from being too obnoxiously large, while giving me more than enough capacity for the demands that will be on the panel in my shack.  The next step for this will be to sheath the run that will be exposed in the shack with EMT.  

     In addition to this real work, I did some "planning" work as well.  Before I close up walls I want to run some coax and wire in the general direction of where the eventual tower will be.  Trying to guess how much wire you'll need in the future is almost always bound to leave you wishing you had done more.  Conduit is a great thing, but in the area were I need to run it, I have some restrictions on sizes of what will fit.  After getting some feedback from the twitter crowd, here's what I think I'm going to shoot for:
  • 4 runs of LMR 400
  • 2 empty conduits.  One inch is all that will fit in the one section, but at least it will be there for whatever comes up in the future.
  • 1 multi-conductor control cable (for rotors etc. in the future)
  • 1 network cable (just in case I want to stick any Ethernet devices up there)
  • A couple of strategically placed access hatches

     Luckily, if I find in the future that I missed something, I will still be able to add to this - it will just require a much longer run around the side of the house.  

     If you have any input or thoughts for me, please feel free to share them!  It will probably take me a couple weeks (or a month...) to round all this stuff up and find the time to get it pulled into place.  Till then, have a good one!
Previous: Shack Build
Next: Shack Build
Back to Part 1
2 Comments

Back in the Saddle

10/30/2017

3 Comments

 
Post Contains Affiliate Links     
     It dawned on me that it has been quite a while since I've done any digital modes work from home.  I think the last time I did, I was still using my GutterTenna as my primary home antenna.  That simply had to change!
     Tonight I dug my SignaLink out of the pile, brought it up to my temporary shack in the master bedroom closet, hooked every thing up, set the levels, and made a contact.  Awesome!
     This might seem like a small victory, but usually by the time I can get on the radio at night, there is a sleeping baby on the other side of the wall.  This eliminates any mode that makes noise after about 23:00 UTC.  I've been slowly working on my CW, but even that is challenging at night.  The side tones and static are enough to stir him, but if I wear headphones so I don't disturb him, I also can't hear him if he needs me.
     Digital modes to the rescue!  Using digital modes, I can make contacts without making any sound (other than they typing on my keyboard) AND I can keep my ears peeled for the sounds that mean daddy is needed.  If you're on the air in the evenings, look for me hanging around the HF digital frequencies!
    Time for a new slogan - "Digital Modes: letting babies sleep and parents play radio all night long!"
3 Comments

Health and Welfare (and Progress)

9/1/2017

0 Comments

 
Post contains affiliate links
     Welcome to part number (who knows?) of my shack build!  In my last update here on my blog, I had just hung up the plywood panels that will become the "walls" of my operating position, through which, and into which, I will eventually be mounting my radio equipment.
Picture

If you follow me on Instagram or Twitter (and I recommend you do - check out the links at the top of the sidebar!) you got to see some pictures of the next phase of things that I just wrapped up.  
In Lancaster, PA, where I live, we apparently sit on top of significant natural uranium deposits.  We also have very porous topsoil.  These two factors together mean that Radon is very prevalent in our area.  Our home however, was built before radon was really discovered, so when it was built, radon mitigation wasn't a thing.  I always assumed that our levels were probably fine, because our house sits on a little bit of a hill with a daylight exposure basement.  In theory, this usually means radon can't accumulate because it seeps out through gaps around doors, windows, etc.  A while back though, we decided to test and it turns out the levels in our basement were HIGH.  
With the amount of time I am planning on spending in my basement ham shack, I figured I better deal with it!  For many reasons, we often recommend that ham shacks be in the basement, but we never talk about making sure the basement is a safe place!  I STRONGLY urge you to test the radon levels in your basement, especially if that is where your shack is, or if you spend any significant amount of time down there! 
When we built our addition, the foundation and basement slab in the new section were equipped for radon mitigation when we did the project.  This meant that I just needed to add a couple of additional suction points in the existing house, (where the shack will be) and tie them into the piping in the new section.  The first step to accomplish this was to get out the hammer drill and make some holes.
Picture
The first hole I made was in the wall between the original house and the addition, so that my new radon piping (in the old section of the house) could pass through to tie in to the radon mitigation piping in the addition.
After making a hole in the wall, I needed to make 2 holes in the floor - one for each of the suction points I would be adding in the main part of the house.  To make the holes, I just used my hammer drill to make a series of smaller holes in a circle, and then used my sledge hammer and a chisel bit in the hammer drill to knock out the center.  With this done, if you were the radon under my house, this is the new view you would have:
Picture

In my opinion, the most tedious part of the suction points was excavating out the stuff from under the slab, to make the air pocket big enough.  I found that a combination of a hand trowel and my big shop vac was just the trick for this.  Scrape Scrape Suck, Repeat.
With the new holes in place, it was time to start running pipe!  Radon systems use either 3" or 4" piping, depending on the size of the runs etc.  There are calculators available to determine what you need based on lengths of runs etc.  Short of that, many outfits will just use 4" piping so they don't have to worry about it.  In my case, because the system was being retrofit, there were some spaces where 4" pipe just wouldn't fit, so I had to go with 3".  This means I have to use a slightly more expensive fan to keep airflow where it needs to be, but that was a better option then tearing a lot of stuff apart, or doing nothing at all!
Picture

I think the most unique thing about my install however, was dealing with the section of the pipe that needed to be exposed.  Because of ceiling heights etc. there are some things in the shack that will be exposed conduit and pipe.  This can actually be a neat look, so I'm just going with it.  With that thought in mind however, white plastic pipe doesn't quite fit the bill as "looking neat" so here's what I did for the section that would be exposed:
The first thing I did was measure, cut it to length, and do a dry test fit.  Once I knew I had it the right size I masked the ends, where it would need to be glued. I also used some 120 grit sandpaper to rough up the PVC and get the glossy sheen off of it everywhere that wasn't masked.  With that prep work done, I hammered a piece of conduit into the backyard so I could slip my pipe over it, to stand it on end.  (If you saw my Instagram post, this is what I was up to when I was getting strange looks from the neighbors...)
Picture

With a beautiful view in the background, I started spray painting!  In keeping with the look I was after, I used black paint with a textured finished.  The goal was to have it still look like a pipe, just not a cheap plastic one!  I have used the Rust-Oleum "Hammered" paint in the past, so I knew it would give me the texture I was after.
Picture

After 2 coats of paint I pulled the tape off the ends, and had this fancy looking thing standing in my back yard for a couple hours to dry:
Picture

Once the paint was dry enough to handle, this last section of pipe got put in place, so now instead of a cheap looking white pipe going through my shack, I have something that "looks the part" just a little bit better:
Picture

With the last section of pipe in place, I finished up my afternoon by putting pipe straps and hangers in place, and sealing up the holes around the suction points.  All that's left to do is to install the new Radon fan in the pipe outside the house, do a fresh radon test to check the new levels, and I should have a radioactive-free space, to be radio-active.
Previous: Shack Build
Next: Shack Build
Back to Part 1
0 Comments

Operating Position

5/26/2017

2 Comments

 
Post Contains Affiliate Links
I have another update to share on the progress in my shack! The operating position received the treatment that will make up the "wall" behind the desk. My little helper wanted to demonstrate what it would look like when someone was sitting in the chair, so use your imagination and pretend she is sitting on a comfortable office chair, with a desktop/work surface around her, along with the dim glow from all the radio equipment:
Picture
Here are a couple more pictures, and then I'll describe my slightly unorthodox method to hang this, what I used, and what the plan is:
While this might not look like much at the moment, it actually represents something that I put a bit of forethought into. I like a clean look, so I knew that for my operating position, I wanted the equipment recessed into the wall, so that from the desk you would just see the faces of the equipment through purposefully sized cutouts. What you see here is actually 3/4 inch maple plywood, that will be stained, since that is in keeping with the look I'm after for the room.  The wood wall will give me the look I'm after, while giving me the ability to mount the equipment they way I want.
The framing that this plywood is on was framed with studs 24 inches on center instead of the standard 16 inches, so that there would be room for equipment to slide in between the studs. This also gives me plenty of space between studs to use some rack mount hardware, or potentially even put racks behind, with the faces flush with the wall. I have also mentioned previously, but now you can better see, that I framed the wall about 4 feet from the back of the room.  This gives me a utility space that I can walk into, which will give me access to the back of all the equipment, and a place to put the "non-glamorous" components, like back-up batteries, etc.
Picture

I hung these plywood panels in a non-traditional way. Since these panels will be stained, and will be the visible "wall", I didn't want to see screw heads.  To make this happen I borrowed a tool from my YL (I'm pretty sure I've used it more than she has...)

​For those that don't know, this thing is called a Kreg Jig. It lets you create perfect holes for pocket screws, which is a pretty slick way to hide fasteners. The most common application is probably for making the face frames for cabinetry, since they are an easy and fast way to join material that is butted together. In my case, when combined with some construction adhesive between the stud and plywood, it was a perfect way to screw my panels from the rear, while being sure that the tips of the screws wouldn't poke through the face!
Picture

The way the height works out, once I build the desktop, the desktop and splash guard will hide the seam between the top panel and the one below. The end result will be a seamless wall the I can mount equipment in, that is strong enough to hold anything that I might reasonably hang on it (TV / PC monitors) that gives me a finished look, while at the same time giving me very easy access to the rear of the equipment!
I'm pleased with how it's coming along! If you were doing a similar project, what features would you build in while you had the chance?
P.S.  I found a use for the cutoff ends of this plywood, to build something that my YL has wanted for a while, that has a bit of a ham radio tie-in.  I'll share that soon!
Previous: Shack Build
Next: Shack Build
Back to Part 1 of this Project
2 Comments
<<Previous
Forward>>

    Categories

    All
    Antenna
    Cw
    Digital-modes
    Flying-with-gear
    Home QTH
    Miscellaneous
    Mobile
    Operating Events
    Portable
    POTA
    Shack Build
    Technical


    - N3VEM -

         Welcome to my Ham Radio Blog!  This blog was started primarily to share my two concurrent shack builds - my mobile station and my home station.  Over time, this has grown to include sharing about my operations, and general radio-related thoughts that I have as a newer operator.  
         
    ​Enjoy!

    RSS Feed


    Picture
    POTA!

    Picture
    Proving that hams do indeed still build stuff!

    Picture
    100 Watts and Wire is an awesome community, based around an excellent podcast. 

    Archives

    September 2020
    July 2020
    January 2020
    September 2019
    August 2019
    July 2019
    June 2019
    May 2019
    March 2019
    January 2019
    December 2018
    November 2018
    October 2018
    September 2018
    August 2018
    July 2018
    June 2018
    May 2018
    April 2018
    March 2018
    February 2018
    January 2018
    December 2017
    November 2017
    October 2017
    September 2017
    August 2017
    July 2017
    June 2017
    May 2017
    April 2017
    March 2017
    February 2017
    January 2017
    December 2016
    November 2016
    October 2016
    September 2016
    August 2016
    July 2016
    June 2016
    May 2016
    April 2016
    March 2016
    February 2016
    January 2016
    December 2015
    November 2015


Picture
Copyright © 2015
 Vance Martin is a participant in the Amazon Services LLC Associates Program, an affiliate advertising program designed to provide a means for sites to earn advertising fees by advertising and linking to amazon.com.