NOVEMBER 3 VICTOR ECHO MIKE
  • Blog
  • Events and Activations
  • Diversions
  • About
  • Gallery
  • Contact
  • Links
  • Subscribe
  • Search
  • Blog
  • Events and Activations
  • Diversions
  • About
  • Gallery
  • Contact
  • Links
  • Subscribe
  • Search
NOVEMBER 3 VICTOR ECHO MIKE

ham radio Projects and musings from a (Relatively) new operator

What's on my Workbench?

2/22/2017

0 Comments

 
post contains affiliate links
     Or rather.....what's on my kitchen table (to the annoyance of my YL...)
Picture
     This post was inspired by 2 things.  Firstly, I have a mini-project that I embarked on, but secondly, one of the podcasts that I listen to - Ham Radio 360 - challenged listeners to let them know what they have on their workbench.  [Ed.  I ended up getting to talk to KF7IJZ about this project on Episode 19!]  Maybe sometime I'll write a review of my thoughts on this podcast, but I'll sum it now by saying "It's Awesome!!"  (I really should ask them if they are cool with me putting a link to their site in my sidebar, but I haven't gotten around to it yet...[Ed. - it's there now!])  They do something that no other podcast does - they alternate styles every other week.  The main show is hosted by Cale - K4CDN and he covers all kinds of topics (like this week's episode on something else I love...WWFF!)  The alternate shows are hosted by Jeremy - KF7IJZ and George - KJ6VU.  These guys do a more technical, project driven show that they call "The Workbench."  Anyway, before I get too far off topic here - check them out!

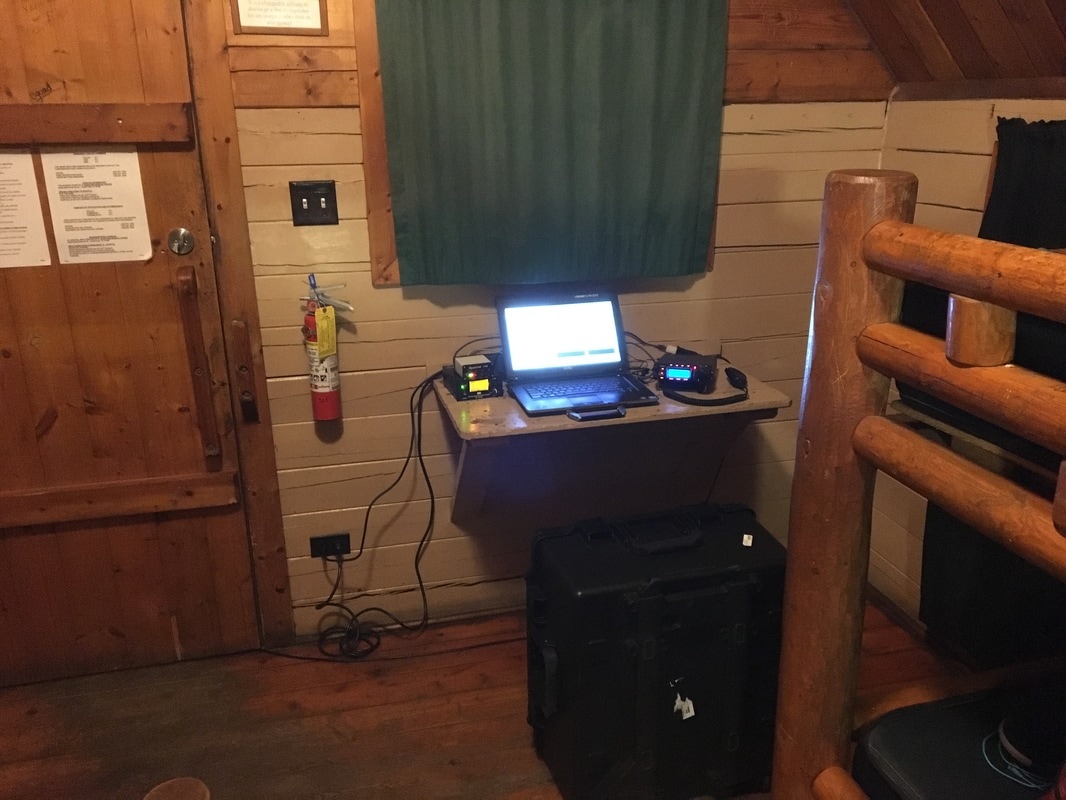
      Moving on to what I'm up to - as many of you know I tend to do mostly portable and mobile operations because I travel a lot for work.  I also do a lot of digital modes, so part of my traveling gear is a Signalink USB interface and my Laptop (I love my laptop!  It's not new, but it's very "beefy" and awesome for traveling and banging around with my stuff.)
     This project started because I wanted an interface that I could use to connect my iPhone or Samsung Tablet to my Yeasu 857d.  There are commercial solutions out there if you want to buy something, like the WolphiLink and EasyDigi interface.  At the end of the day, I think most of these interfaces are basically Audio Isolation Transformers with a couple other tidbits.  Both of these options are well reviewed, and for a fully assembled unit in a box, run around $40.  I stumbled on a schematic for the EasyDigi (Do a Google search - you'll find it too!), and when I saw how simple it was I said - hey, I bet I can build that!  I don't have much of a stash of parts, so to avoid the $40 commercial, premade, option, I promptly ran out and spent $36 at RadioShack.....I know I know, I could have just bought one, but what's the fun in that?!  Plus, I got some other stuff, so the parts for this project were probably only about $20 of that bill.
     Armed with my bits and pieces from RadioShack, and the schematic from my Google search, I came up with this:
Picture
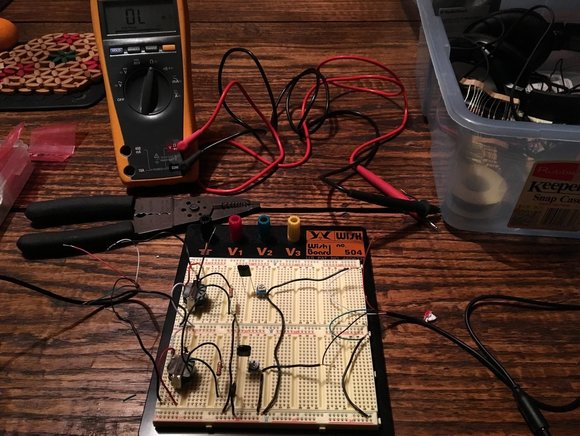
     I'm not a professional by any stretch, so when I play around with stuff I always like to bread-board it first, to make sure it works before I make anything permanent with solder :-)  In my initial test last night, the "Transmit Audio" portion was working just fine. I used an app on my iPhone to generate audio, and on the other end I just used headphones to listen to it coming through.  The only thing I added to the schematic you'll find on Google is potentiometers, so that I can adjust the input and output levels passing through.
     When I get to move forward on this project, I'll try to sketch out some schematics so that I have something that I can post here to share with you (you know - usage rights and all that business.)  With that being said, here's what's next for this project that you can watch for in the future:
  • Making up a 6 pin male connector so that I can connect this to my rig - I'll be keeping an eye on the thrift shops for a $0.50 PS/2 Mouse or Keyboard that I can cut the cable off of.  If I don't find one I suppose I'll actually buy a connector.
  • Potentially make up an adapter so that I can also use this with my HT and PocketPacket for APRS.
  • Test it with my radio's on the breadboard
  • Wire it up permanently in a box of some type
  • Pat myself on the back!
Jump to Part 2
0 Comments

Oleta River State Park KFF Activation

2/18/2017

1 Comment

 
Post Contains Affiliate Links
Picture
Picture
     This past Wednesday I woke up at 3:00am, with temperatures just under 30 degrees Fahrenheit (-1 C) and made my way to the Harrisburg Airport in my home state of Pennsylvania.  By the end of the day I was setting up my radio equipment in Oleta River State Park for another WWFF-KFF activation just outside Miami, Florida, where temperatures were 82 degrees Fahrenheit (28 C).  It's nice to experience some warm weather in February!
     For me, this was another one of my work trips that took me on the road.  Since I was visiting our Miami office, I looked around at the parks that were on the list at the KFF web site. The Oleta River State Park is a little gem, kind of hidden just at the edge of Miami - I'm sure that a lot of people pass right by it without ever realizing it is even there.  If you slow down to have a look, within just a few minutes of the hustle and bustle of both Miami and Ft. Lauderdale is this:
Picture
     Another neat thing about this park is that for less than the price of most chain hotels, you can have a very unique experience staying in one of their small cabins:
     While these are neat little cabins, I will warn you that it is much more fun if you are an "earthy" person.  Creature comforts are limited to mattresses that have seen better days, the furniture you see on the porch in the picture above, picnic tables, and a communal bathhouse (with only 1 working shower in the men's room!)  Notable things that are missing if you are accustomed to standard hotel chains are things like bed linens, pillows, towels, toiletries etc.  Any time you stay in a lodge/cottage/cabin inside a state park, think of it more like camping where you need all the stuff you would need if you were camping, except for your tent.
     For those of us that don't mind a little grit however, this was an awesome place to set up and play radio!  The bunk beds quickly became the place where I threw my luggage.  There was a small, wall mounted table which immediately became my operating desk, and (after emptying it) one of my Pelican Storm Cases become my chair.  Operating position - check.
     While the less hardy folks out there might be worried about the rodent sized crack under the door, for me this made a simple, and perfect place to run coax out to my antenna!  Once again, I was confronted with a situation where I didn't have any decent size trees within reach of the amount of feedline I have, so I used my buddipole mast to support my Quick and Dirty Feedpoint that I used to feed 2 inverted V dipoles - one for 20 meters and one for 40 meters.  Because the soil here is a weird mix of sand / rock / coral I couldn't really use my ground screw that I normally use to anchor the center of my mast, so I made use of what was available - the picnic table!
Picture
     So with that - antennas were up and ready to go, and I was able to start operating.  With conditions being what they are, and my antennas being so close to the ground, most of my contacts were domestic, but I did have 1 with Italy (on 40 meters, with an antenna only about 12 feet of the ground!), 1 with the Azores, and 1 with Puerto Rico.  The biggest highlight however, was my first ever CW contacts!  My first ever CW contact was with Richard - W0IS [ed.  Rick has his own blog! - www.onetuberadio.com check it out!] and my second came from Chuck - KO4SB.  Thanks guys!  Since I still didn't own a key (I just bought one today) I made those CW contacts using the Up and Down buttons on my mic via the "MicKey" option on my Yeasu 857d.  If anyone wants to know how to do that let me know, because it isn't intuitive, and you have to have the settings on the rig just right - I'm willing to share so you don't have to mess around trying to figure it out like I did!  

     Because I like to have some "lessons learned" every time I do something like this, here's a list of some of the things I took away from this activation, that might help you if you do something similar (of course, you might be a pro, and already knew these things...)
  • If you travel a lot make sure you buy non-aerosol bug spray (you can't take aerosol on the plane, even in checked bags.  I should have known this with all my traveling I do, but I guess never considered it before.)
  • Make a checklist of things you need, and keep it with your gear/traveling supplies so you don't forget anything.  I forgot a towel, so each day after my shower I had to dry myself with my shirt from the day before!  I also had to use a shoe to pound in my tent stakes that I use to tie off my dipole ends!
  • It's cheaper to fly with two 50lb pound bags (on AA $60), then it is to fly with a single overweight 70lb bag (on AA- $125.)  See my post about re-organizing my luggage.
  • If you think cats fighting make an awful sound, you've never heard a racoon fight.
  • There are some awesome little natural spaces hidden right in the middle of our populated areas - go look for them!  
1 Comment

Reorganization

2/15/2017

2 Comments

 
I'm actually sitting in the airport, just before 5:30am as I write this post. I'm traveling for work today, but like I always do, I'm taking Radio stuff with me!
I actually reorganized my packing for this trip. Firstly, my big stuff and work equipment I broke down into 2 cases, because I found out (after 2 years of doing this!) that it is cheaper to check 2 bags at 50lbs each, then to check 1 overweight bag. That means this trip is costing less for baggage, and I could bring a couple extra bits and pieces!
Picture
I also re-organized my "personal item" that I carry on the plane with me. It's a standard case, but slightly bigger than the laptop sized one I used to carry. This lets me be a little more organized with my stuff, and actually makes it easier to pop the body of my 867d in and out of the box quicker, since it has to go through the x-ray machine in it's own tray. The new layout is organized like this:
  • Top layer: 857d Radio body, hand mic, rig runner 4004u, and a box with all the interconnection wires for everything in this case.
  • Bottom layer: signalink USB interface, MFJ Power Supply, LDG YT-100 tuner, radio faceplate
It's all tucked in there with pick-n-pluck foam to keep things nice and cozy!
2 Comments

Finishing Off The Mast

2/10/2017

0 Comments

 
Post contains affiliate links
     So, for the very observant among you, you may have realized that I finished my "Mast-from-junk" but didn't fill you in on all the details!  So how would you know this?  The giveaway would probably be that if you happened to read my post on Winter Field Day this year or happened to watch my video about Winter Field Day you would have realized that I used it!
     With that being said, if you want to read about how my junk-mast project got started, check out Part 1 of the story before continuing on here.  If you already read Part 1, or if you just like to shoot from the hip and decided you'll figure it out as you go - read on!
     For a quick refresher (or for those that don't want to go back and read) here's the quick summary - I had been eyeballing fiberglass masts, and while deciding what to buy, I stumbled upon a telescoping fiberglass pole that was bound for a dumpster in one of the many commercial buildings that my work takes me to.  From there, I decided to start piecing together other bits of junk, or at least cheap stuff, to make myself a functional mast.
     At the point I left off, I had the mast, and I had inserted a piece of broom handle that had painter's pole thread on the end, and I had started fixing that all together.  Sometime shortly after that post I also stumbled onto a short section of scrap PVC that I needed to make a "splint" over a hole that had been drilled in the bottom section of the pole.  Now that you're caught up, here we go!
Picture
     One of the next things I added to the mast was an eye-hook.  Since I had filled the gap around the pole in the middle with epoxy (I used the loctite stuff you can get from amazon or a local supplier because it flows nicely to fill the gap, but cures nice and hard), I drilled a hole through the mast, epoxy, and center pole, and added this eye-hook that I dug out of the hardware drawer in my garage.  This means that the top of this mast can now accept a buddi-pole thread adapter, anything that I can clip into the eye-hook, or anything that I can clamp around the mast (since the top is pretty solidly filled with epoxy.)
     With the top of the mast done, I wanted to add guy rings, so that I could attach ropes etc. to keep things tall and straight.  Thankfully, I managed to dig up some scrap pieces of HDPE plastic that I had left over from the mounting panel that I made for the control head of the radio in my car (you can read about that project in my post called New and Improved.)  If you don't happen to have this stuff lying around, I'd recommend grabbing some, as it comes in handy for all kinds of radio-related projects where you need to make mounting panels, brackets, etc. and you need something that looks nice, and isn't metal.
     I had some of this that was white, and some that was black, but for making guy rings, I figured it doesn't matter if they match or not!
     I let the guy rings "float" so that they can rotate around their section of the pole which makes putting things up easier.  The top guy ring stays on the mast because it can't slide down past the section below it, and it can't slide up past the eye hook.  The bottom section is trapped between between the fitting for the next section up, and the "splint" that I made to span the hole that someone drilled through the pole in the past.  As a note - I didn't permanently attach the splint till the guy ring was in place - otherwise I would have run into a small problem....
     All that was left to do at this point was to add guy ropes. Thanks to life being busy, I didn't actually get around to that until we were actually setting up for Winter Field Day!  If you watch the video some of what we're doing when you see us with the tape measure stretched out is actually measuring and cutting the guy ropes.  The worked out well...below is close-up of the guy ropes attached to the pole, and a picture from Winter Field Day with the mast standing at full height, in all of its saved-from-the-trash glory. 
     All in, since most of the parts I used were junk or scraps, this mast cost me about 60 cents per foot of height.  Compare that to the $4.00 plus per foot of height for a commercially made mast, and I think I did alright - don't you?
Back to Part 1
Continue to Part 3
0 Comments

Winter Field Day 2017

2/4/2017

4 Comments

 
     I won't write too much about my Winter Field Day 2017 activation, other than to say it was blast!  At the end of this post I included a video, so other than a few short comments, I'll let the video do the talking for me.
     For my antenna I used my "Mast-From-Junk" even though I have trees in my backyard, mainly because I wanted to press it into service (but also because my little operator wanted to set up the mast!)  I also used my "quick and dirty feedpoint" at the top of the mast.  I did 2 inverted V antenna's - one for 40 and one for 20, perpendicular to each other, with the single feed-point, and it worked out great!
     The last think I'll blabber about, before I get to the good stuff, is that I used one of these for heat, both last year and this year, and it worked out great!  
​   
     They are awesome for this type of thing because they have a bunch of safety features (auto shut off if they tip over, if it senses low oxygen, etc. etc.) and they work well for "keeping the edge off" when you're in the cold (this year it was pretty warm for January - Mid 30's F during the day, only dropped to the 20's F at night.)   
​     I use the optional extension hose to hook it to a larger propane bottle.  If you do this like I do, be sure to get the filter, since it's hard to know what's in the propane, depending on where you get your bottles filled!  I also keep an extinguisher handy just in case, but this heater has never given any reason to suspect I would ever need it!
​

     Okay, so here's what you were all waiting for!  My "Photo Video" of Winter Field Day in my back yard!  

     Thanks for watching, and 73!
4 Comments
<<Previous
Forward>>

    Categories

    All
    Antenna
    Cw
    Digital-modes
    Flying-with-gear
    Home QTH
    Miscellaneous
    Mobile
    Operating Events
    Portable
    POTA
    Shack Build
    Technical


    - N3VEM -

         Welcome to my Ham Radio Blog!  This blog was started primarily to share my two concurrent shack builds - my mobile station and my home station.  Over time, this has grown to include sharing about my operations, and general radio-related thoughts that I have as a newer operator.  
         
    ​Enjoy!

    RSS Feed


    Picture
    POTA!

    Picture
    Proving that hams do indeed still build stuff!

    Picture
    100 Watts and Wire is an awesome community, based around an excellent podcast. 

    Archives

    September 2020
    July 2020
    January 2020
    September 2019
    August 2019
    July 2019
    June 2019
    May 2019
    March 2019
    January 2019
    December 2018
    November 2018
    October 2018
    September 2018
    August 2018
    July 2018
    June 2018
    May 2018
    April 2018
    March 2018
    February 2018
    January 2018
    December 2017
    November 2017
    October 2017
    September 2017
    August 2017
    July 2017
    June 2017
    May 2017
    April 2017
    March 2017
    February 2017
    January 2017
    December 2016
    November 2016
    October 2016
    September 2016
    August 2016
    July 2016
    June 2016
    May 2016
    April 2016
    March 2016
    February 2016
    January 2016
    December 2015
    November 2015


Picture
Copyright © 2015
 Vance Martin is a participant in the Amazon Services LLC Associates Program, an affiliate advertising program designed to provide a means for sites to earn advertising fees by advertising and linking to amazon.com.