NOVEMBER 3 VICTOR ECHO MIKE
  • Blog
  • Events and Activations
  • Diversions
  • About
  • Gallery
  • Contact
  • Links
  • Subscribe
  • Search
  • Blog
  • Events and Activations
  • Diversions
  • About
  • Gallery
  • Contact
  • Links
  • Subscribe
  • Search
NOVEMBER 3 VICTOR ECHO MIKE

ham radio Projects and musings from a (Relatively) new operator

Crowd-Sourced Project: Does this Compute?

10/11/2017

2 Comments

 
Post Contains Affiliate Links     
     Thanks to everyone who voted on what to base this little station around!  With all of your input, the overwhelming decision was that I should build around the BITX40.  If that sentence leaves you completely baffled, you might want to go back to part 1 and come up to speed :-)  After you do that, please head over to the subscribe page so that you can stay up date on all my projects!  The final results of the voting put the rigs we identified in the following order, highest scoring to lowest:​
  1. BITX40
  2. uBITX
  3. Mountain Topper 3b
  4. Elecraft KX1
  5. Hendricks PFR-3b
  6. W7EL Optimized QRP Transceiver
  7. Bayou Jumper
  8. ConnectSystems CS108GS / Xiegu X108G 
​ 
     So with the decision on the rig made, I sent my payment off to HFSigs.com and now I just have to wait for the package to arrive!  While I wait, I want you to once again help me decide on the next component of this project - the Computer!
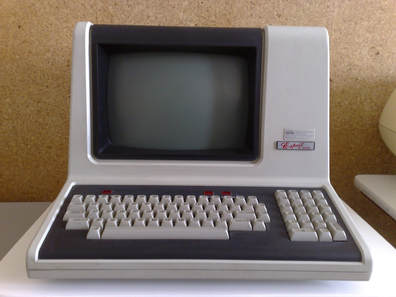
Picture

Okay, so maybe not THAT computer, but you get the idea!  In some of our earlier voting the general opinion was, if there's room for a small computer, try to get one in there.  With the radio that ended up being chosen, there will definitely be space to get something in there, so rather than drag things out, here are the options:
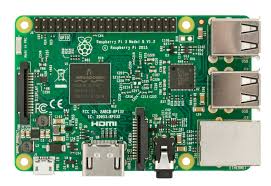
Raspberry Pi
Picture
If you don't know what this is, go ahead and climb out from under that log, dust yourself off, trim the beard you've been growing while sleeping for the last decade, and head over here to read about them.  After that, go here to buy it before everyone finds out you didn't already have one (or 2, or 3)
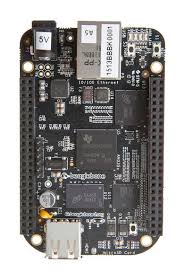
BeagleBone
Picture
I won't be hard on you if you don't know about this one.  These are another option in the single board computer market, but they haven't gotten the popularity craze that the Raspberry Pi has. They are a little more capable, but I guess people just like Pi more than they like Beagles...
If you're interested in a good article comparing the Beaglebone to the Raspberry Pi you can check out this article over at techlila.
Kangaroo +
Picture
Say what now?  Aren't kangaroos those things hopping our friends in VK land?  Well, yes...but they are also a product that the company bills as being a "mobile desktop PC."  Basically, its a tiny, out of the box computer.  Just plug it into a monitor, add your favorite interface device (mouse, keyboard, etc.) and start computing.  The slick thing here, is that it has a built in battery, which would take some load off the battery in the box, leaving more amp-hours for the rig, and it is much more powerful than either of the single board PC's above.  You can check out the full scoop on these here.
One of Those Cheap Android Tablets
There are quite a few android tablets on the market, and some of them are pretty inexpensive.  The downside of a tablet is that I would be more restricted in software options, since I would be tied to using mobile apps.  The benefit though, is that a tablet would be an all in one solution and most tablets have fairly robust internal batteries.  Just like the Kangroo+, having internal batteries gives the benefit of saving more battery power for the rig.  All that would need to be done would be to figure out a mounting method in the box.
Final Thought Before the Vote
Just a quick thought before the official voting - you may have noticed that I didn't really touch on monitors or interface devices to go with these computers. I'm doing a "presumptive close" on that aspect.  Due to our scope requirement for everything to fit in the box, there isn't really room for a mouse and keyboard, unless we went with a rather non-elegant, fold/up, roll/up type, which ultimately would just take room from something else.  Since small touchscreen monitors are relatively inexpensive for all these options, that is the route I will pursue.  If anyone feels strongly that I should do something other than this however, feel free to comment or reach out to me via any of the methods on my contacts page. 

Voting is now closed!


Thanks for voting!
Back to Part 7
Continue to Part 9
Back to Part 1
2 Comments

Crowd-Sourced Project: Choosing the Important Parts

10/4/2017

4 Comments

 
It's time to get some more input!  If you haven't been following along with my Crowd-Sourced Project series, you can either start from part 1, or stick around for the 60 second overview!   Also, if you hate being left behind, don't forget to subscribe to stay up to date.  As a reminder, this project is crowd-sourced, NOT crowd funded - I don't want your money, I'm just looking for ideas as I work on this project!
Picture

​Quick Review
This project started because I ended up with a neat little box, that was begging to become a ham radio project.  Rather than just start building something, I decided to do an experiment and at each step along the way, ask all of you "what would you do here?" It's been interesting to see where that takes us.
With the quick overview out of the way, it's finally time to vote for the radio that will be the core of this project.  If you don't feel like reading through the old posts to see what types of things were factored into the scope, these are the things that are driving the list you are now voting on:
  • It has to fit in the box I'm using
  • Per voting, we're focusing on HF
  • Per voting, the radio should NOT be software defined
  • Per my veto power as the sole financial contributor, some options were eliminated due to cost
  • It needs to be able to run off the battery that was already in the box
The Contenders 
If you are familiar with all of these radio's, feel free to skip straight to the voting if you'd like.  If not, here is a quick overview of each one, and a couple comments from me on my thoughts (but remember - in this case my opinion matters less than all of yours collectively!)
Picturephoto courtesy of hfsigs.com

​BITX40
​
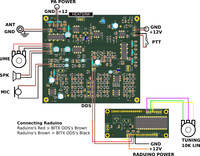
If you don't already know about this little radio, you've got some catching up to do, and a good place to start is here. This little radio fits all of the criteria for this project, and has the benefit of being very "hack-able" to changes in the future.  Another benefit of this one, is that the HamRadio360 Workbench crew is currently talking through builds of these little radio's, so this would fit that theme for anyone like me who is a fan of their podcast.  This is a very simple kit, and it would be a pretty quick build.

Bands: 40, others with simple modifications
Mode: SSB, others with simple modifications
TX power: 7 watts
Rough Price: $60
PicturePhoto courtesy of qrpkits.com
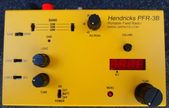
Hendricks PFR-3B
This kit comes from Pacific Antenna.  It should work well, but may require a different battery mounting method then what is already in the box (simple enough to change!)

​Bands: 40, 30, 20
Mode: CW
TX power: 5 watts
Rough Price: $275
PicturePhoto courtesy of lnrprecision.com
Mountain Topper 3B
This is a small radio from LNR Precision that comes as either a kit or prebuilt. With it's small size, fit would be no concern!

Bands: 40, 30, 20
Mode: CW
TX power: 2.5 watts
Rough Price: $260 / 270 (Kit / Prebuilt)
PicturePhoto courtesy of elecraft.com
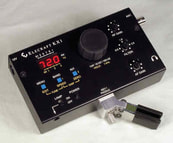
Elecraft KX1
This radio meets all the criteria, and was suggested by a couple of different folks. The only catch is that it is discontinued, and finding a used one may be a bit hit or miss. Luckily, the details about this radio are still available on Elecraft's site.

Bands: 40, 20
Mode: CW
TX power: 4 watts
Rough Price: $300
W7EL Optimized qrp transceiver
This is actually not so much a radio, as it is plans and a parts list to source and build it on your own.  The ARRL has a copy of the build information available here for reference.

Bands: 40
Mode: CW
TX power: 1.5 watts
Rough Price: depends on sourcing, but probably very inexpensive.
PicturePhoto courtesy of phonestack.com/farhan
uBITX
Does this sound familiar?  It should!  Ashhar Farhan designed this, the multi-band successor to the BITX40.  It isn't available yet as a kit, but plans and parts lists are available on Ashhar's site. This would take longer to build, but would probably be a rewarding project!

Bands: 160, 80, 60, 40, 30, 20, 17, 15, 12, 10​
Mode: SSB, CW
TX power: 5 - 10 watts depending on band
Rough Price: $50 and a well stocked junk box
PicturePhoto courtesy of 4sqrp.com
4sqrqrp Bayou Jumper
This is an interesting little crystal controlled qrp rig.  The receiver is a regenerative design, making this radio more "old school" which can have a certain charm to it.  The only bad part of this is that being crystal controlled means you're restricted to whatever frequencies you have crystals for.

Bands: 40​
Mode: CW
TX power: 5watts 
Rough Price: $80
PicturePhoto courtesy of connectsystems.com
ConnectSystems CS108G (​Xiegu X108G)
This a rig from a new company, that is trying to break into the portable rig market. They are surprisingly full featured for the price, and they seem to be starting to get a loyal following. It's at the top end of what I had in mind for this project cost-wise, but if this is what everyone votes for, I'll set aside some pennies for a little bit!

Bands: 160, 80, 60, 40, 30, 20, 17, 15, 12, 10
Mode: SSB, AM, CW
TX power: 20 watts 
Rough Price: $400
Lets Vote!
We'll pause here for the official vote, but if you happen to be curious about a rig you suggested and why it isn't on the list, I'll give some "bonus material" after the vote for those who want to stick around.


​Voting is Now Closed - Stay Tuned for Results!

​The Rejects
As promised, here's the short list of some of the commonly suggested radios that didn't make the cut for the vote, and the reasons why:

Yeasu FT-891: Fit, Cost, and if it is similar to my 857d, even on low power the surge during startup will trip the safety circuit in the battery, rendering it out of scope

Yeasu FT-817(ND): Borderline Fit, Cost (for new, might find used within range), out of scope bands (project was voted to be HF focused)

Elecraft KX2: Scope (this is an SDR), Cost

There are quite a few other radios that might have made the list, but these were the options that were suggested most often, that I felt warranted an explanation as to why they weren't being considered.  

Thanks for your input!
Back to Part 6
Continue to Part 8
Back to Part 1
4 Comments

Another Trip to the Roof

9/27/2017

0 Comments

 
Post Contains Affiliate Links     
Picture
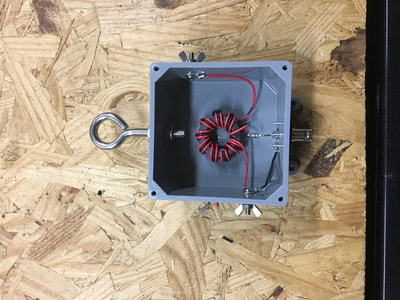
     My temporary random-wire antenna and 9:1 unun have already been taken out of service.  Cheer up though - they are out of service because I was so pleased with how they were working, I decided to make a more permanent version!

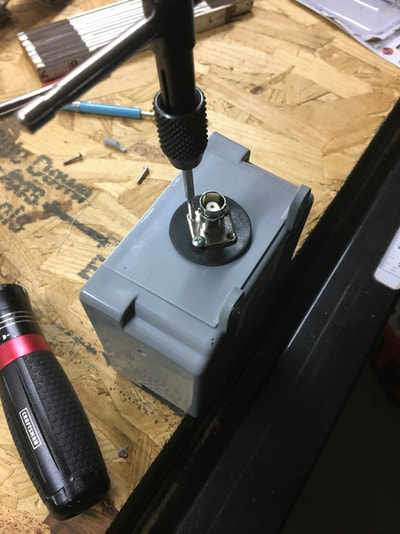
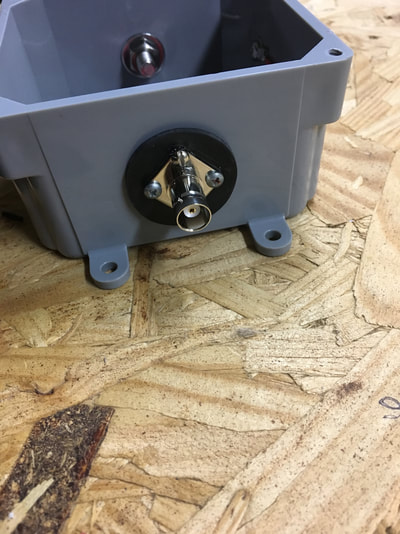
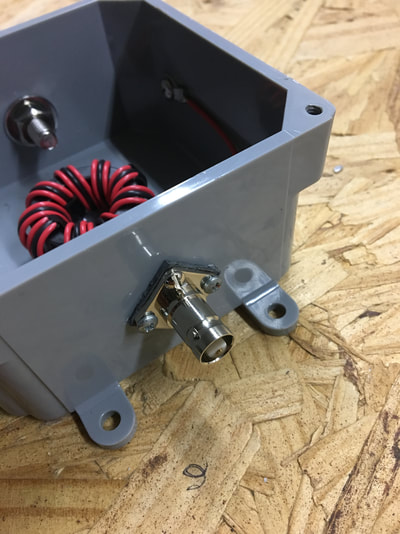
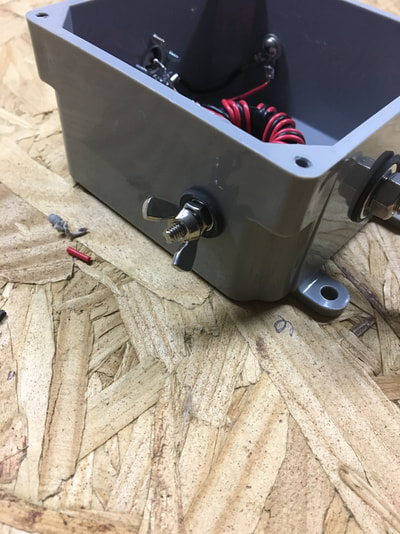
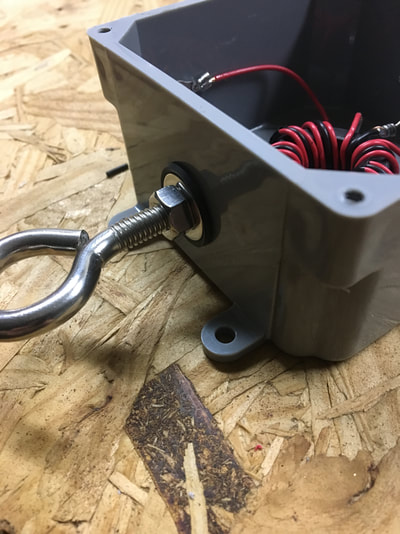
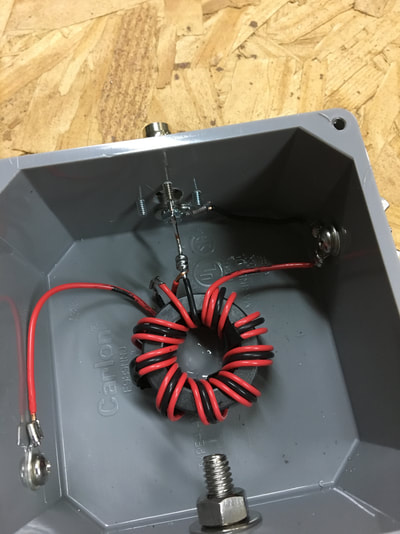
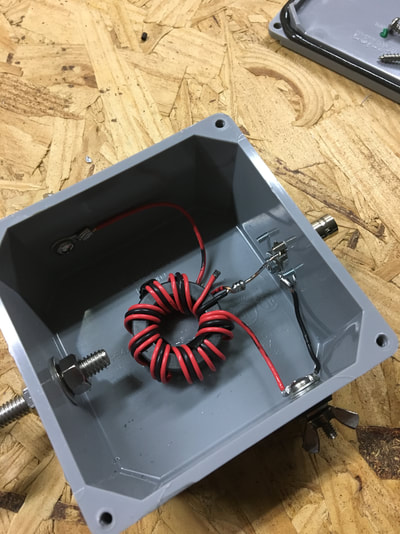
I built my permanent version of the 9:1 unun into a 4" x 4" exterior enclosure.  As for construction techniques there was very little difference in the method I used for this one, compared to what I did for my smaller, portable version.  The most obvious difference was the weatherproof box, and the addition of a large eye bolt in the "top" of the box.  Other than these obvious difference, there were a couple other things that I did with this one:
  • All hardware is stainless steel
  • Every piece of hardware that penetrates the box was mounted with rubber washers to help seal out the weather.
  • I used a dab of silicone as "glue" to help hold the torroid in place
     So just like that I had a new, more rugged, weatherproof 9:1 unun.  This meant that it was time to make another trip to the roof.  The way our addition was built, when standing on the kitchen roof, you are at the gable end of the of the house, behind the garage.  This gave me a fairly easy place to mount the unun at the end of the eve.
     This spot works out very well, because it is easy to feed the unun from the temporary shack in the master bedroom closet, and when I eventually finish the basement shack, I'll be able to drop a run of coax straight down the corner of the house, to the entrance panel for the shack.  
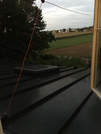
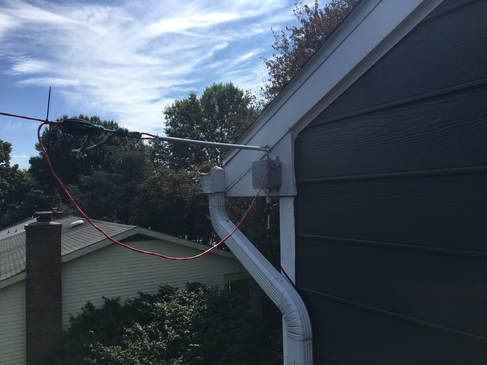
     The pictures tell you pretty much everything you need to know, but I'll give some of the highlights of the mounting on the house end.  The box was mounted using exterior screws.  I put a small dollop of silicon at each spot I was going to be running a screw in, to help seal out the weather.  The large eye bolt became the mounting point for the "house end" of the antenna.  I used a heavy duty screen-door spring and a couple of carabiners between the eye bolt and the fence insulator holding the end of the antenna.  I also left enough of a service-loop between the insulator and the unun so that the spring could stretch fully.  For the counterpoise side, I ran a solid 14 gauge wire from the unun down to the metal roof below. 
Picture
The "house-end" of my random wire antenna. To answer the question - no my house isn't that much bigger than my neighbors. Our house just happens to sit on the crest of a little hill so our neighbors on both sides are slightly lower in elevation.

     Now I'm sure there are some "bigger is better" folks out there who might ask why I didn't use heavier hardware, use a lag screw into the house instead of the eye bolt in the box, etc.  My choice in hardware was actually very deliberate.  I chose sizes that would hold everything firmly, but would also be the weak-point in the event of any type of failure.  With this arrangement, should the worst happen, the plastic box or one of the connectors should break and let everything drop, instead of pulling parts off my house!
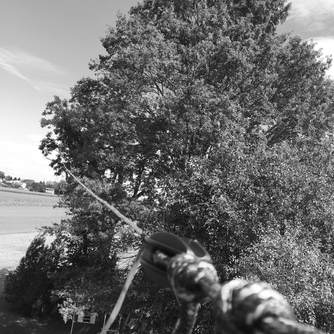
    At the other end, I also replaced the mason's line that was temporarily holding the antenna in the tree.  My first step was to use the mason's line that was in place to haul up a proper rope.  Again, because the other end is attached to my house, I didn't use the heavy duty rope that many people usually use - I used a relatively lightweight 250 lb rope.  I also ran an eye-screw into the tree at the back corner, about 10' off the ground.  Since I have kiddos running around out back, I wanted the end to be up high enough that they couldn't reach it by standing on any of their toys, but low enough that I could reach it with a step ladder.
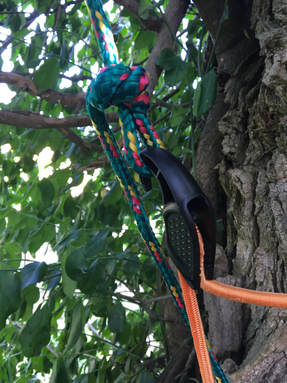
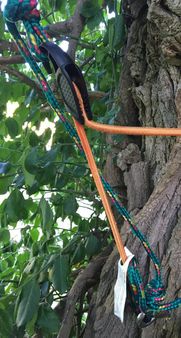
     This was also another spot where I gave the antenna just a little bit of wiggle room.  With the antenna at full height I put a loop in the rope about 2 feet from where the eye screw was.  I then used a bungee between this loop and the eye screw.  
Picture
If (when) the bungee eventually gives in to the outdoors, I also made a clove-hitch with the end of the rope so that if (when) the bungee snaps, the antenna will only drop a couple of feet.  I might eventually put a screen-door spring at this end too, but for now, this will work just fine!
Picture

     So there it is - same wire in the air, but more robustly installed, since I've decided to keep it around for a while!
Picture
Picture

     One last thing before I go - please sign up for my mailing list so you can be among the first to know when I've written a new post!  I appreciate everyone that reads my blog regularly, so I'd like to return the favor by giving you the first shot at everything new that gets posted!

Bye for now!
0 Comments

Ham Radio Lullaby

9/22/2017

0 Comments

 
Before you think I made this up just to write a blog post, let me assure you that I actually sing this to my kids every night before bed.  I'm that kind of nerd....
Sing to the tune of "Rock-a-Bye Baby"

Rock-a-bye baby on the tower top
when the wind blows the gin pole will rock
when the mast breaks my baby won't fall
she had on her harness lanyard and all
Sleep tight!
0 Comments

Flying With Ham Radio

9/21/2017

0 Comments

 
​Over time I've seen questions about flying with ham radio pop up in places like Facebook and Twitter.  At some point people started asking me direct questions about it - at first I wondered why, but then it dawned on me - I have mentioned it quite often!
My YL suggested that I write up a short summary to help point people in the right direction, but it took an interview with Curtis of the Everything Ham Radio Podcast to motivate me to actually get it done.  Check it out!
Picture

​To give you the quick summary, traveling with ham radio gear is easy!  The only catch I'll add is that everything here is about domestic flights.  Flying internationally can be a different story because you can end up involved with customs and import/export regulations.  
     Below are a number of posts I've written on the subject in the past, but I'll sum up with this - just follow the TSA rules, and you're good to go!  Most of the people that have "trouble" with TSA create it for themselves.  To get on an airplane with your ham radio equipment, just remember these easy highlights:
     They are just doing their job.  They've seen weirder stuff than what you have.  You aren't "special" in their eyes, you are just another passenger they need to process through line.  If you do what you are asked and answer any questions politely, you and all your gear will be waiting at the gate before you know it!
     With that summary out of the way, check out these posts for my insights and thoughts on the subject!
Packing the Bags
Show and tell of how I pack for a work trip, HF station and all, without any checked baggage!  You don’t have to have tiny, CW only gear to do this – small 100 watt HF transceivers can fit the bill if you’re smart about your packing!

Flying Ham 
In this article I talk about my “normal” packing strategy for what is the most common luggage arrangement most people run into – 1 checked bag, 1 carry on, and 1 person item.  I also touch on TSA and ham radio equipment.  This is the thing that most hams seems to have the most concern about, but it is actually the least exciting, and easiest, part of traveling with radio gear!

Reorganization 
Where I discuss a something I learned – it’s cheaper to fly with two 50 pound bags, than it is to fly with one 70 pound bag.  I Also shared some pictures of my “personal item” which has radio body, etc. in it.
​
Pop Culture Central 
This post is mostly not about flying, but I do show one of the cables I travel with, and talk about using rental cars as my generator when I’ve flown somewhere.  If for some reason you can’t take power with you, this is an excellent way to get it once you get to where you’re going.  I also give an example of how planning to use what you’ll have on the other end (a rental car’s spare tire) can eliminate pieces that you would normally need to take along (a guy stake.)

Bummer Dude 
Another post that isn’t about flying specifically, but I do talk briefly about carrying my radio as a “personal item”, and included a picture of how I threw it in the case for this trip. 
​
William Howard Taft 
​This post is also mostly not about flying, but I also share pictures of a setup I did at a site after flying in.  This was another one where I demonstrate using the rental car as a generator.  I also learned on this trip that a cheap power inverter is NOT the way to go for laptop power.  Either travel with an inverter you know is RF quite, or just get a car charger for your laptop, if you insist on computer logging!
​I'll leave you with 1 final tip before I go: batteries.....
     TSA specifically talks about batteries here, but I'll give you a quick summary as it pertains to ham radio.  Your best bet is to carry LiFePo4 or Lithium Iron Batteries, and to put them in your carry-on.  They state that consumer batteries of up to 100 watt-hours are allowed in this manner.  This works out to about an 8ah battery.  Since they don't list a quantity, you could carry several of these.  They also generically say you can take "2 larger batteries" with airline approval, up to about 160 watt-hours, which is about a 13ah battery. If you want to power a full 100 watt rig, 2 of these will do the trick without being prohibitively heavy!
​
I hope you find some of this useful as you prepare to travel with your gear...I never leave home without mine!
0 Comments
<<Previous
Forward>>

    Categories

    All
    Antenna
    Cw
    Digital-modes
    Flying-with-gear
    Home QTH
    Miscellaneous
    Mobile
    Operating Events
    Portable
    POTA
    Shack Build
    Technical


    - N3VEM -

         Welcome to my Ham Radio Blog!  This blog was started primarily to share my two concurrent shack builds - my mobile station and my home station.  Over time, this has grown to include sharing about my operations, and general radio-related thoughts that I have as a newer operator.  
         
    ​Enjoy!

    RSS Feed


    Picture
    POTA!

    Picture
    Proving that hams do indeed still build stuff!

    Picture
    100 Watts and Wire is an awesome community, based around an excellent podcast. 

    Archives

    September 2020
    July 2020
    January 2020
    September 2019
    August 2019
    July 2019
    June 2019
    May 2019
    March 2019
    January 2019
    December 2018
    November 2018
    October 2018
    September 2018
    August 2018
    July 2018
    June 2018
    May 2018
    April 2018
    March 2018
    February 2018
    January 2018
    December 2017
    November 2017
    October 2017
    September 2017
    August 2017
    July 2017
    June 2017
    May 2017
    April 2017
    March 2017
    February 2017
    January 2017
    December 2016
    November 2016
    October 2016
    September 2016
    August 2016
    July 2016
    June 2016
    May 2016
    April 2016
    March 2016
    February 2016
    January 2016
    December 2015
    November 2015


Picture
Copyright © 2015
 Vance Martin is a participant in the Amazon Services LLC Associates Program, an affiliate advertising program designed to provide a means for sites to earn advertising fees by advertising and linking to amazon.com.