Over the long Thanksgiving weekend I started working on installing the mount for my HF antenna(s). The mount I ordered was from breedlove, who makes some pretty hefty mounts - solid brass, aluminum and delrin for the insulating parts. I chose the mount I did, because it will work with the hamsticks that I already have, that I used on my last vehicle, and it is also hefty enough for the smaller screwdriver antenna's, which I plan to switch to at some point, when the budget allows.
To start, I removed the carpeted liner from the trunk lid. To do that was fairly easy, I just had to pop out the little plastic snaps, pop off the latch cover (already off in this picture), and take off the plastic handle (to the left, not yet removed):
To start, I removed the carpeted liner from the trunk lid. To do that was fairly easy, I just had to pop out the little plastic snaps, pop off the latch cover (already off in this picture), and take off the plastic handle (to the left, not yet removed):
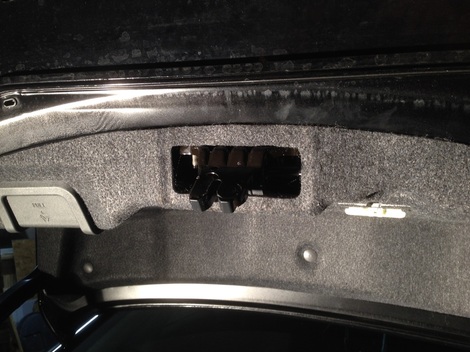
With the carpeted liner removed, it is easy to see the cross member that runs down the center of the trunk lid (from front to back.) I knew this was there from peeking in here a while ago, and I had ordered my mount accordingly - normally I would have liked the mount with the 4" base, but that wouldn't fit in the space, so I ordered one of the mounts with a 3" base. Basically, the support member and the sheet metal of the trunk lid make a sort of tunnel, so I knew the back of my mount was going to have to fit inside this "tunnel."
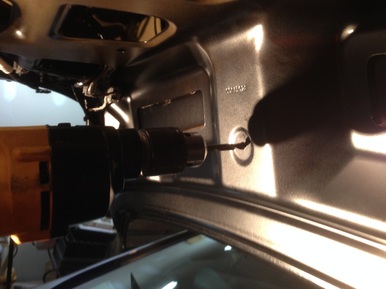
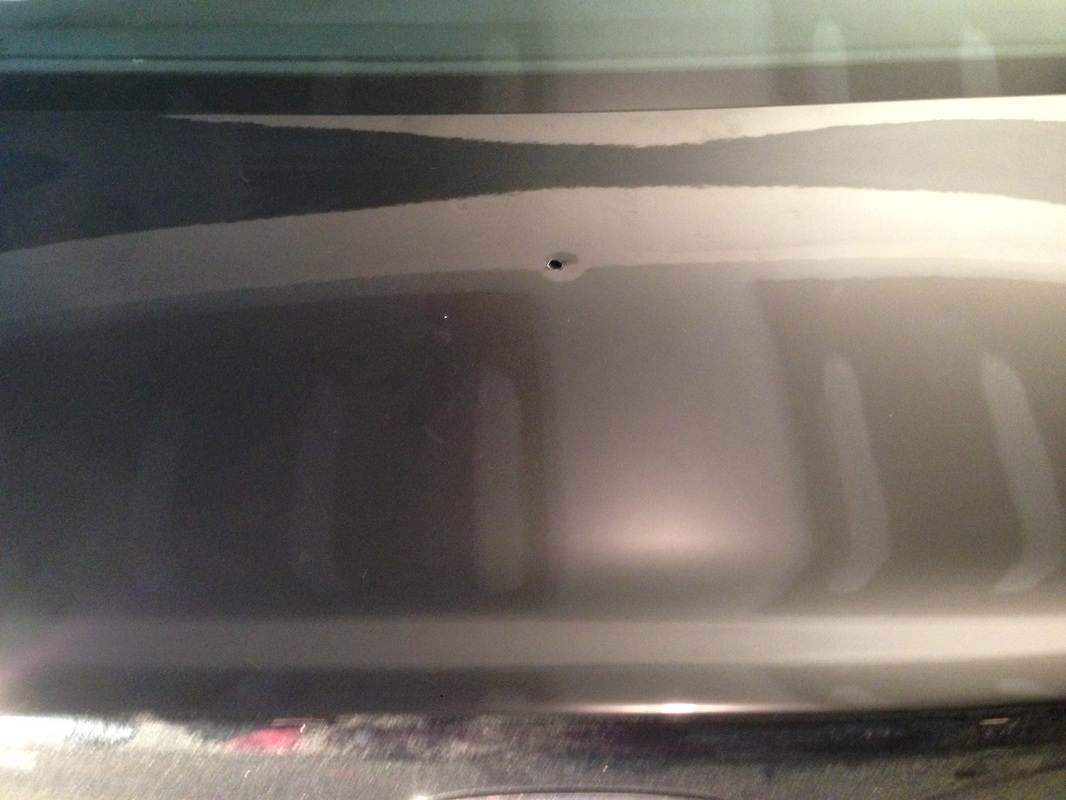
To drill the holes for the mount, I started by using a factory hole in this "tunnel" that was centered on the vehicle from side to side. I chose a drill bit that fit this hole perfectly, that would reach the whole way through to the top of the trunk lid. I then used this to drill my pilot hole. Below you can see me lining up my drill from the inside, and the resulting pilot hole as seen on the top of the trunk lid. The picture of the top of the trunk lid is a little confusing to look at, because you can see the unfinished drywall of my garage ceiling reflected on the closed trunk...sorry for that!
To drill the holes for the mount, I started by using a factory hole in this "tunnel" that was centered on the vehicle from side to side. I chose a drill bit that fit this hole perfectly, that would reach the whole way through to the top of the trunk lid. I then used this to drill my pilot hole. Below you can see me lining up my drill from the inside, and the resulting pilot hole as seen on the top of the trunk lid. The picture of the top of the trunk lid is a little confusing to look at, because you can see the unfinished drywall of my garage ceiling reflected on the closed trunk...sorry for that!
 |  |
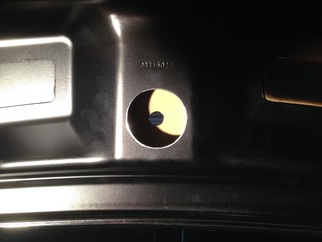
With the pilot hole drilled, I stepped up to a 5/8" drill bit for the hold in the top, which is what was needed for the center bolt of the mount I used. I then used a 2 1/2" hole saw on the inside, to create a larger "access" hole to work from underneath the mount.
At this point, I was able to install the HF mount using just the center bolt, so that I could turn things side to side, and adjust the ball front to back, until everything was plumb. To get everything plumb, I stuck the fiberlass bottom section of a 6 meter hamstick into the mount, and used my level against that. After I had it plumb, I used the mount as a guide to drill the other holes, to lock everything in place. After tightening all the nuts and bolts down, here's how it looked:
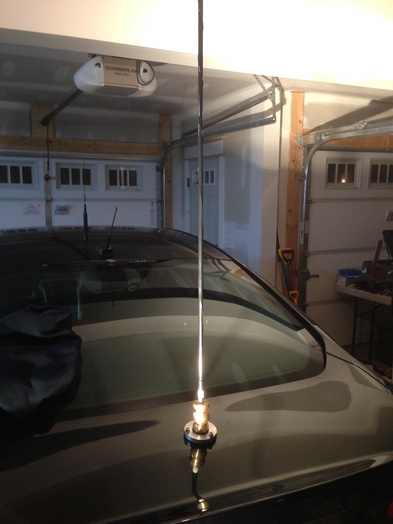 | 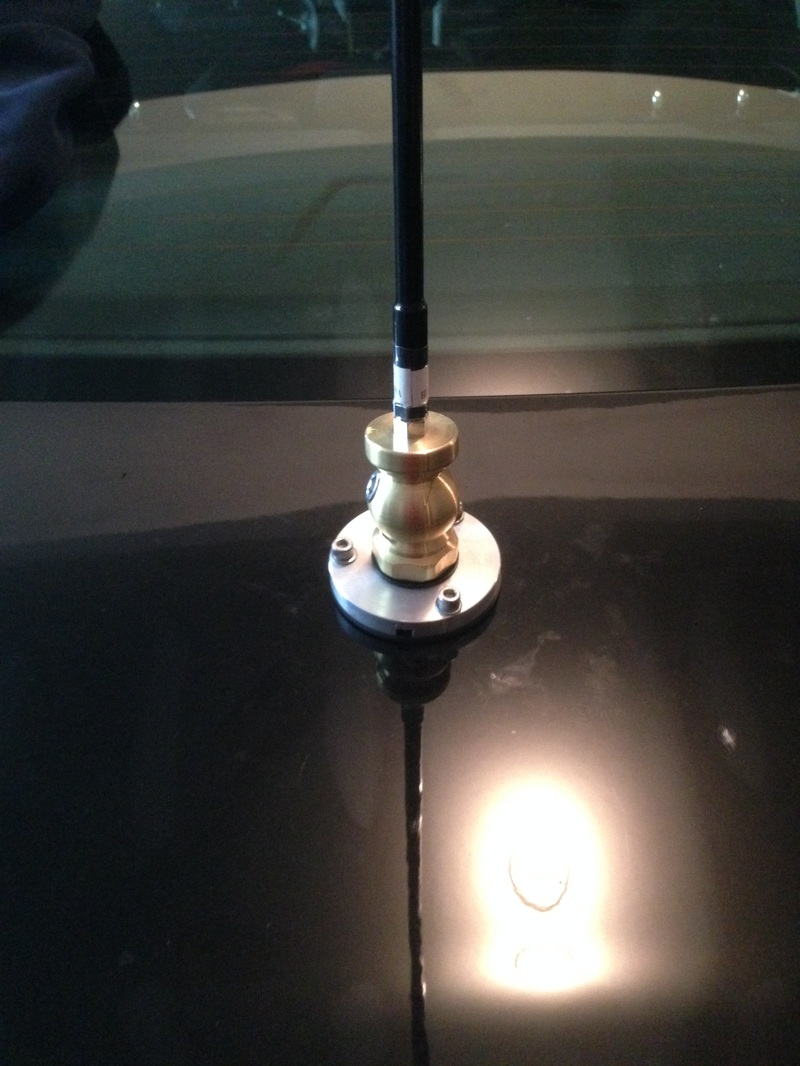 |
The morning after doing this, I connected the coax to the mount, and ran it to the antenna. I covered the coax in split loom and routed it along the trunk hinge on the right, so that it would match the factory wiring that runs along the trunk hinge on the left. I also then filled the "tunnel" with expanding foam so that it would stiffen everything up, and provide extra stability to help keep the sheet metal on the top from wanting to flex as the wind catches the antenna while driving down the highway. Before spraying in the foam, I packed rolled up bubble wrap around the edges of the access hole, so that the foam wouldn't cover the antenna connections, or bulge out through the access hole for working on the antenna connections. As for the type of foam, I used the stuff from the big box store that is designed for large gaps, and holy smokes did it ever do the trick! I can now grab this mount and shake the whole car, with barely any deflection the sheet metal it is mounted on.
At this point I have 2 primary things to do, in order to have somewhat decent HF capability in the car. The first is to install bonding straps between the various sheetmetal parts of the car. Some of the hardware I need for that I ordered from Amazon today, so that will probably be a project next week sometime. Once the bonding is done, I can do final tuning on the antennas. At that point I'll have working HF......but I'll be far from done with this project. Check back soon to see what's coming!
At this point I have 2 primary things to do, in order to have somewhat decent HF capability in the car. The first is to install bonding straps between the various sheetmetal parts of the car. Some of the hardware I need for that I ordered from Amazon today, so that will probably be a project next week sometime. Once the bonding is done, I can do final tuning on the antennas. At that point I'll have working HF......but I'll be far from done with this project. Check back soon to see what's coming!
 RSS Feed